(Not long after, I took this photo at Hengistbury Head - I think I got the colours right!)
Colours used -
0419 x 2 Choo choo Train
0354 x 4 Bluebell Mix
0438 x 2 Inkblot Blue
0440 x 2 Blue Bird
0251 x 3 White
0216 x 4 Sky
0321 x 2 Pastel Blue
0326 x 2 Denim
0436 x 1 Teal
0428 x 1 Soft Brown
0435 x 1 Light Grey
0441 x 2 Little Bow (these last 3 not used in the final blanket)
0419 x 2 Choo choo Train
0354 x 4 Bluebell Mix
0438 x 2 Inkblot Blue
0440 x 2 Blue Bird
0251 x 3 White
0216 x 4 Sky
0321 x 2 Pastel Blue
0326 x 2 Denim
0436 x 1 Teal
0428 x 1 Soft Brown
0435 x 1 Light Grey
0441 x 2 Little Bow (these last 3 not used in the final blanket)
I kept looking and thinking and decided on a ripple blanket. Then I spent quite a while on Pinterest looking at lots of ripple blankets!! Take a look at just a few that I liked enough to pin –
https://uk.pinterest.com/tinaspice/crochet-ripple-blanket/
I’d seen Lucy of Attic24’s Neat Ripple (http://attic24.typepad.com/weblog/neat-ripple-pattern.html) and although I liked it, I wasn’t totally in love with the texture of it. At the time it reminded me of knitted garter stitch (which I really don't like) and I wanted stocking stitch. So I thought, that’s ok, I’ll just work one row of each colour not two, and only work on the right side.
I was still quite new to crochet then and hadn’t quite expected what would happen with a ripple pattern if I did that. It wasn’t a complete disaster - and it had the lovely smooth texture I wanted - but I quickly realised the error of my ways. Look –
I should have taken a photo of the whole piece so you could see the side edges wanted to drift to the right but you can see that the centre stitch of each ripple certainly isn’t vertical!! This shows it better - same photo but with true vertical and my vertical...
I should have taken a photo of the whole piece so you could see the side edges wanted to drift to the right but you can see that the centre stitch of each ripple certainly isn’t vertical!! This shows it better - same photo but with true vertical and my vertical...
See what I mean?... I forgot that when you work a straight horizontal row, you skip the first stich and work into the turning chain at the far end. Then turn the work and repeat. That keeps the edges straight.
But how do you do that with a ripple when you don’t want to turn the work??
I was too shy to ask Lucy herself but did had come across another blogger (Claire) who had written a ripple tutorial, so asked her. http://mrsbrownmakes.blogspot.co.uk/p/ripple.html
She was so lovely and helpful and had also not realised quite what would happen if you didn’t turn the work with a ripple pattern. Anyway, I decided to put my squiffy blanket to one side and re-think. (I would have just unpicked it and re-used the wool but I’d been a good girl and darned all the ends in as I went…)
I realised I would have to turn the work if I wanted to do a ripple, so couldn’t have my stocking stitch texture but at the same time I still didn’t want garter stitch. So I decided to go for lots and lots of texture instead.
I’d already seen Betty McKnit’s 6 day Kid Blanket - http://www.ravelry.com/patterns/library/6-day-kid-blanket - but wasn’t keen on the granny stitch rows but had seen this picture on Pinterest.
There was no link unfortunately; all I know is that it was by a lady called Anne Wilson. She had made a ripple only using granny clusters and I wondered whether I could combine the two patterns, so had a little play around and yes, it worked! And so my Rippling Clusters Blanket was born!!
The dark blue rows were well spread and I only ever worked the treble row with it, never the cluster row. Regularly spaced between them was a row of light teal, a gap, then light and dark teal next to each other. And again with the dark teal, I only ever worked the treble row.
Here it is nearly done, before the border was added.
I changed the colour scheme a little by leaving out the two shades of grey and the sand and sticking with the shades of blue, teal and white. I chose the colour for each row as I worked, rather than plan it out but aimed roughly for dark into light then back to dark. I wanted it to look sort of like white capped waves although I doubt they look like that to anyone else! Naturally, I ended up placing certain colours together very regularly but the only planned colour placement was with the dark blue and teal.
The dark blue rows were well spread and I only ever worked the treble row with it, never the cluster row. Regularly spaced between them was a row of light teal, a gap, then light and dark teal next to each other. And again with the dark teal, I only ever worked the treble row.
Here it is nearly done, before the border was added.
It did take me a long time to finish as I got a little bored and put it away for quite a while. When I got it out again, I didn’t read the little chart I’d made myself, so I think I went wrong… originally I think I chained 2 between the treble clusters – they then became chain one. But it still looks good and is a lovely texture full of English-Sea-colour stripes.
I wrote a new chart showing the stitch pattern, with a “close up” of part of it. Click HERE to open a printable version.
I wrote a new chart showing the stitch pattern, with a “close up” of part of it. Click HERE to open a printable version.
As I got towards the finish, I started looking for ways to straight out the ripple edge really neatly, before working a border. I saw lots of ideas, including -
Attic24 Little Tin Bird Winwick Mum
But none of them exactly fitted my blanket as I had a different stitch count. So I had to work out my own for a 17 stitch pattern repeat ripple and this is what I did -
Straightening the Edge
To begin with, I neatened the long straight side edges.
I’d already seen a couple of people online, Lucy of Attic24 and Heather of Little Tin Bird, who simply did 2 trebles in each row end. But they had worked their ripple blankets differently to mine. I have rows of trebles, treble clusters, as well as double crochet. So I have worked 2 trebles, then 3 trebles, then 2 again, then 3 etc trying to space them evening along the edge.
At the cast off end I did a half treble, then a double crochet to try and line up with the slant of the peak and at the cast on end (I think) I did a double treble.
I was happy with how this looked so moved onto straightening the zig zag edges at the top and bottom. Again, my ripple is different from Lucy and Heather’s and I couldn’t find anyone who had straightned a ripple that had a hole at the bottom of the peak like mine, so had to work out my own. It’s very similar to the ones I’d seen but I opted to do something slightly different on each edge as my cast on edge had the hole on the outward peak and the cast off edge had it on the inward peak. So to speak!
To start with, I measured from peak to peak in the middle of the blanket to get an idea of how many trebles I would need on the straightened edge –
8cm between peaks
7 sts measure 3.5cm (these are the 7 trebles along the side of each peak that don’t have any increases or decreases)
3.5cm divided by 7 sts = 2
Therefore 2 sts measure 1cm
So 8cm will be 16 sts
My ripple has a pattern repeat of 17 stitches, so to get 16 sts I need to decrease 1 st per ripple as I straighten the edge but this decrease will be done differently on each edge. At least it will on my blanket!
On the CAST OFF edge,where the hole is in the bottom of the trough, starting at the bottom of a trough -
DTr2tog, DTr, Tr, Tr, Tr, Tr, 1/2Tr, 1/2Tr, Dc, 1/2Tr, 1/2Tr, Tr, Tr, Tr, Tr, DTr
This still leaves a slight wavy edge, so using the same colour,turn the blanket and work back across the row as follows-
If you were starting in the Dc at the top of the peak (4Dc, 9 X 1/2Tr, 3Dc ) repeat to end (I haven’t marked these sts this in my photo.)
On the CAST ON edge, where the hole is at the top of the trough, starting at the top of a trough –
3Dc in the hole, Dc, 1/2Tr, 1/2Tr, Tr, Tr, DTr, DTr3tog, DTr, Tr, Tr, 1/2Tr, 1/2Tr, Dc
(Apologies – it wasn't until I had edited the photo to add all the stitches that it dawned on me that the photo was upside down, so the hole appears to be at the bottom of the peak...sorry!)
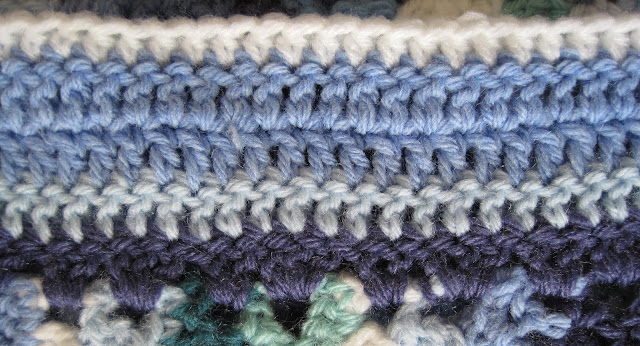
Then I changed colour again and worked two rows of trebles in light denim, then a final row of half trebles in white.
(To be honest, after the 2 rows in light denim my short edges were still looking wavy rather than lovely and flat. So I ripped it back and did yet more decreases across these edges – I took out another 18 sts evenly across the cast on end and 10 across the cast off edge.)
Attic24 Little Tin Bird Winwick Mum
But none of them exactly fitted my blanket as I had a different stitch count. So I had to work out my own for a 17 stitch pattern repeat ripple and this is what I did -
Straightening the Edge
To begin with, I neatened the long straight side edges.
I’d already seen a couple of people online, Lucy of Attic24 and Heather of Little Tin Bird, who simply did 2 trebles in each row end. But they had worked their ripple blankets differently to mine. I have rows of trebles, treble clusters, as well as double crochet. So I have worked 2 trebles, then 3 trebles, then 2 again, then 3 etc trying to space them evening along the edge.
At the cast off end I did a half treble, then a double crochet to try and line up with the slant of the peak and at the cast on end (I think) I did a double treble.
I was happy with how this looked so moved onto straightening the zig zag edges at the top and bottom. Again, my ripple is different from Lucy and Heather’s and I couldn’t find anyone who had straightned a ripple that had a hole at the bottom of the peak like mine, so had to work out my own. It’s very similar to the ones I’d seen but I opted to do something slightly different on each edge as my cast on edge had the hole on the outward peak and the cast off edge had it on the inward peak. So to speak!
To start with, I measured from peak to peak in the middle of the blanket to get an idea of how many trebles I would need on the straightened edge –
8cm between peaks
7 sts measure 3.5cm (these are the 7 trebles along the side of each peak that don’t have any increases or decreases)
3.5cm divided by 7 sts = 2
Therefore 2 sts measure 1cm
So 8cm will be 16 sts
My ripple has a pattern repeat of 17 stitches, so to get 16 sts I need to decrease 1 st per ripple as I straighten the edge but this decrease will be done differently on each edge. At least it will on my blanket!
On the CAST OFF edge,where the hole is in the bottom of the trough, starting at the bottom of a trough -
DTr2tog, DTr, Tr, Tr, Tr, Tr, 1/2Tr, 1/2Tr, Dc, 1/2Tr, 1/2Tr, Tr, Tr, Tr, Tr, DTr
This still leaves a slight wavy edge, so using the same colour,turn the blanket and work back across the row as follows-
If you were starting in the Dc at the top of the peak (4Dc, 9 X 1/2Tr, 3Dc ) repeat to end (I haven’t marked these sts this in my photo.)
3Dc in the hole, Dc, 1/2Tr, 1/2Tr, Tr, Tr, DTr, DTr3tog, DTr, Tr, Tr, 1/2Tr, 1/2Tr, Dc
(Apologies – it wasn't until I had edited the photo to add all the stitches that it dawned on me that the photo was upside down, so the hole appears to be at the bottom of the peak...sorry!)
(For some reason, the cast on end of my blanket is actually wider than the cast off end – maybe all the handling it’s had over the months, although I think I actually may have done 2ch between the treble clusters to begin with and then accidentally changed to 1ch. Anyway, I decided to reduce the width of the border a little more by doing an extra decrease on the next row which I hadn’t done on the cast off edge. After straightening the ripple, turn and work back across the row with a Dc in every stitch but skip the Dc in the middle of the set of 3DC in the hole.)
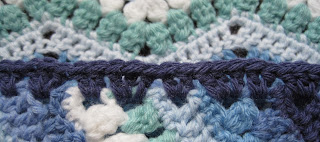
Now change colour – I used my second palest blue – and work a row of trebles right the way around the blanket. In the corner stitch, I worked Tr, Tr, Dtr, Tr, Tr – this gives a nice square corner.
Now change colour – I used my second palest blue – and work a row of trebles right the way around the blanket. In the corner stitch, I worked Tr, Tr, Dtr, Tr, Tr – this gives a nice square corner.
(To be honest, after the 2 rows in light denim my short edges were still looking wavy rather than lovely and flat. So I ripped it back and did yet more decreases across these edges – I took out another 18 sts evenly across the cast on end and 10 across the cast off edge.)
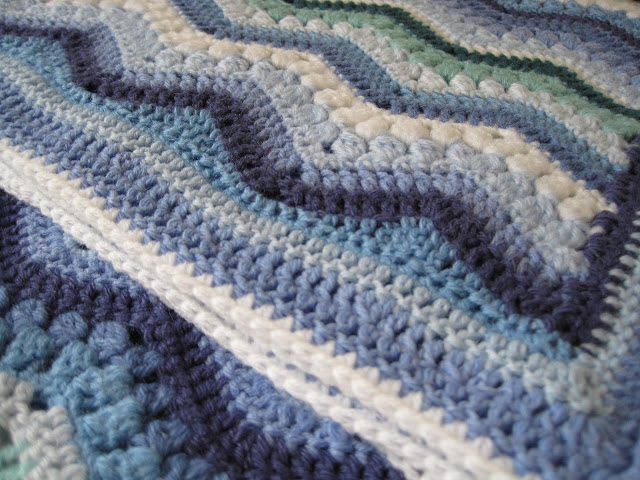
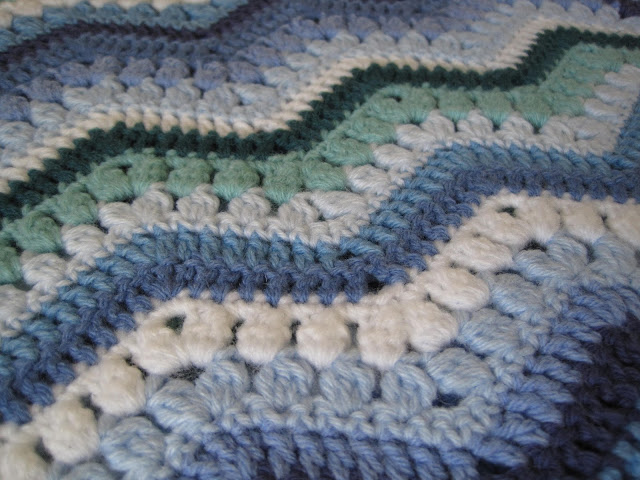
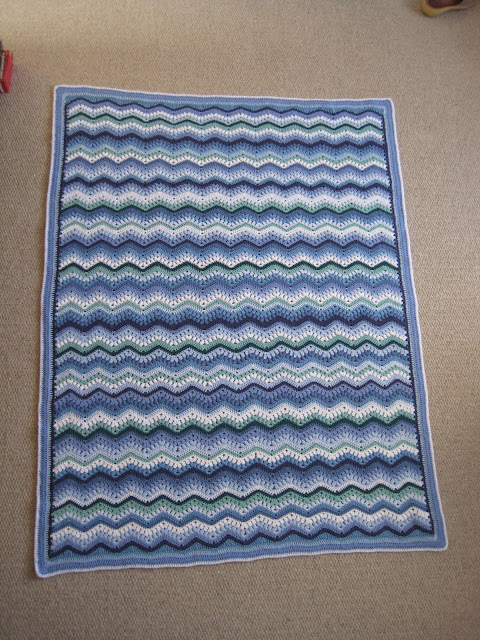
And here it is – the finished blanket!
Here's the corner detail from each side -
And here's the whole blanket -
You can also pop over to my Ravelry project page to read more about actual the making of it.
If you want the chart for how to work the ripples - hand drawn and very squiffy! - then click HERE.
PS Have a look at THIS POST for blocking and steaming tips I came across on Every Trick on the Hook. I tried it on my blanket and it worked a treat!!
You can also pop over to my Ravelry project page to read more about actual the making of it.
If you want the chart for how to work the ripples - hand drawn and very squiffy! - then click HERE.
I hope this all makes sense - let me know if I got anything wrong! And, of course, it goes without saying that I'd love to see your own ripple blanket.








This is beautiful. Thank you so much for creating a gorgeous border and explaining how you did it. I am going to tackle this blanket within the next week or two for my niece.
ReplyDeleteThanks Kerry. I really enjoyed making the blanket - even if it did take me nearly 2 years!
DeleteI'm glad you like the border - it's just enough to finish it off but not so much pattern/colour that it detracts from the ripples.
Good luck with yours - I'd love to see a photo when it's done.
Tina